How to Launch Your First LinkedIn Automation Campaign in Flowkon?
This article explains how to safely launch your first automation campaign in Flowkon after connecting your LinkedIn account. If you are new to LinkedIn automation, following these best practices will help you run outreach safely and effectively.
Verify Your LinkedIn Connection
Before starting any automation, make sure your LinkedIn account is properly connected to Flowkon.
To verify this:
- Go to the Connections tab from the left sidebar.
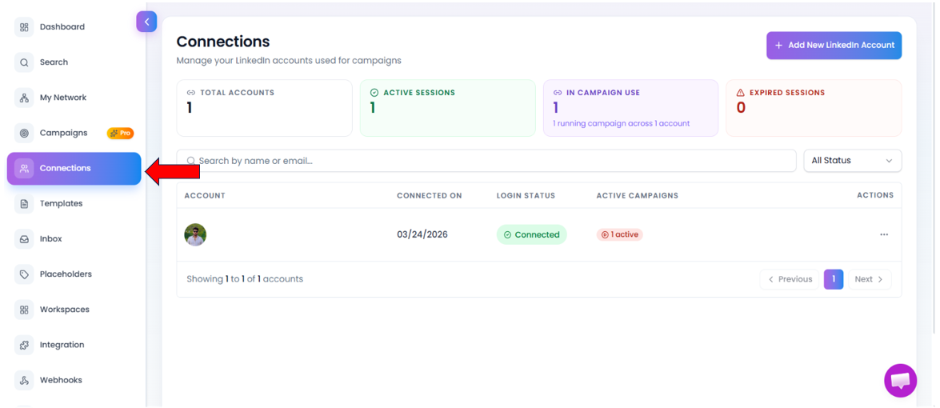
- Check whether your LinkedIn account is Connected or Expired.
- If your account is not properly connected, campaign automation will not run. Make sure there are no connection issues before starting your campaign.
Create Your First Campaign in Flowkon
To begin automation, create a campaign in Flowkon.
When creating a campaign, you will have two options:
Use Existing Campaign Template
If you choose Use Existing Campaign Template, you will be taken to the templates page.
Flowkon provides multiple campaign templates based on different use cases, such as Lead Generation, Recruitment, Founder Outreach etc.
Select the template that best matches your outreach goal and continue with the setup.
Create From Scratch
If you choose Create From Scratch, you can build your campaign manually.
You need to create your campaign flow by selecting and connecting action nodes based on your requirements.
Examples of action nodes include:
- Send Connection Request
- If Connected Condition
- send email etc.
This option gives you more flexibility to design a custom outreach flow. To know more about how to create a campaign click here
Write Personalized Outreach Messages
While creating your campaign flow, some action nodes require message content to be added.
For example:
- If you add a Send Connection Request node, you can include a connection message.
- If you add a Follow-up Message node, you need to write the follow-up message that will be sent to the lead.
- If you add a Send Email node, you need to compose the email subject and email body.
Keep your messages short, natural, and personalized.
Add Leads to Your Campaign
Once your campaign is created, the next step is to add leads to it. To add leads, navigate to the Prospects tab inside the campaign.
There, you can view the list of prospects added to the campaign and manage them easily.
Set Active Hours
Configure campaign working hours to mimic normal human behavior.
Best practices:
- Run campaigns only during business hours
- Keep at least 2 inactive days per week
- Avoid running automation 24/7
Monitor Campaign Performance
Once your campaign is live, monitor performance regularly.
Track important metrics such as:
- Connection acceptance rate
- Reply rate
- Campaign progress
- Lead activity