How to create a campaign?
To create a new campaign in Flowkon, go to the Campaigns tab from the sidebar and click on the + New Campaign button.


After clicking on New Campaign, you will be taken to the campaign setup page, which consists of 5 steps.
Step 1: Basic Campaign Details
In the first step, enter the basic details for your campaign:
- Campaign Name - The Campaign Name is used to identify your campaign easily. You can give a name based on your campaign purpose, target audience.
- Select the email account to send emails - This option allows you to choose the email account that will be used to send emails to prospects during the campaign. If you haven't connected an email account yet, click Connect Email Account to connect one.
- Campaign Goal - The Campaign Goal defines the purpose of your campaign, such as generate prospects, founder outreach, or promote events.
- Description - The description option will allow you to add extra information about the campaign.
- Industry- This option will allow you to add to which industry you will target for example information technology, finance and banking, healthcare and life science etc.
- Target Job Title - This option will allow you to provide the job title.
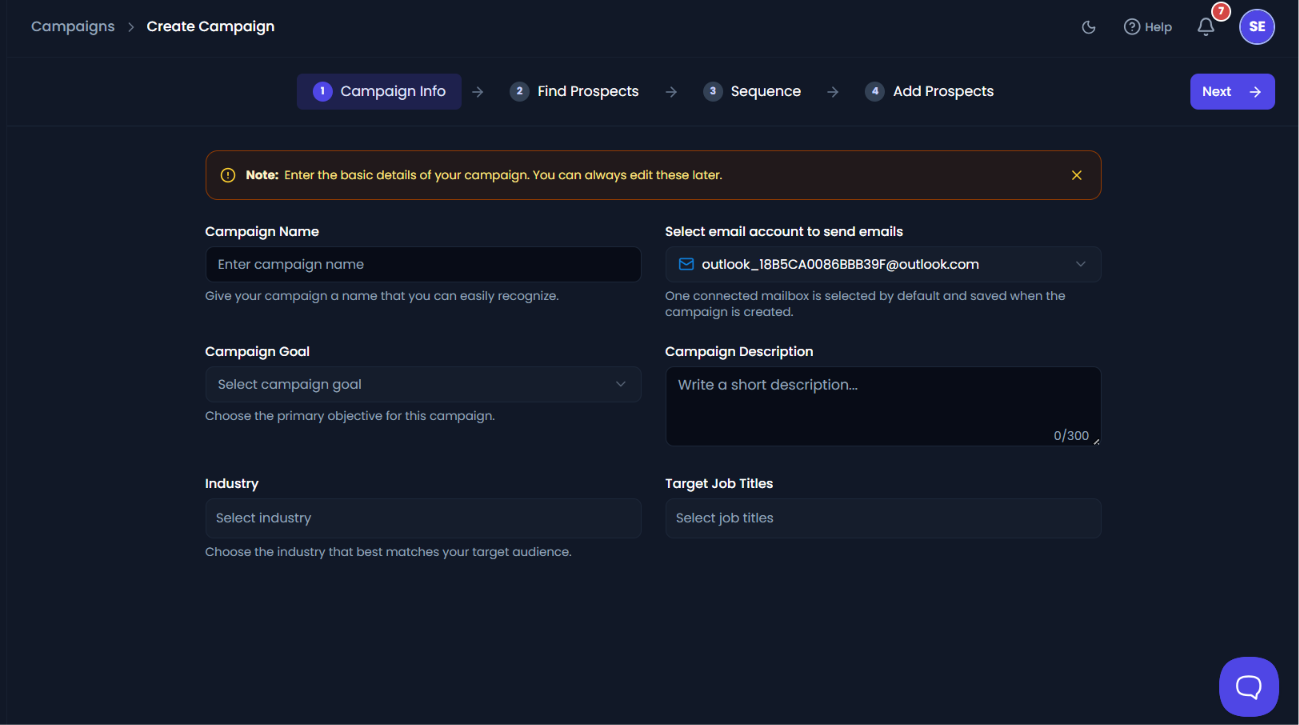
Once all details filled click next.
Step 2: Find Prospects
In this step we can select the prospect list we have created depending on our requirement. Click on Next button.

You can also create new prospect list by clicking on the Find Prospects button and by selecting your preferred prospect method.

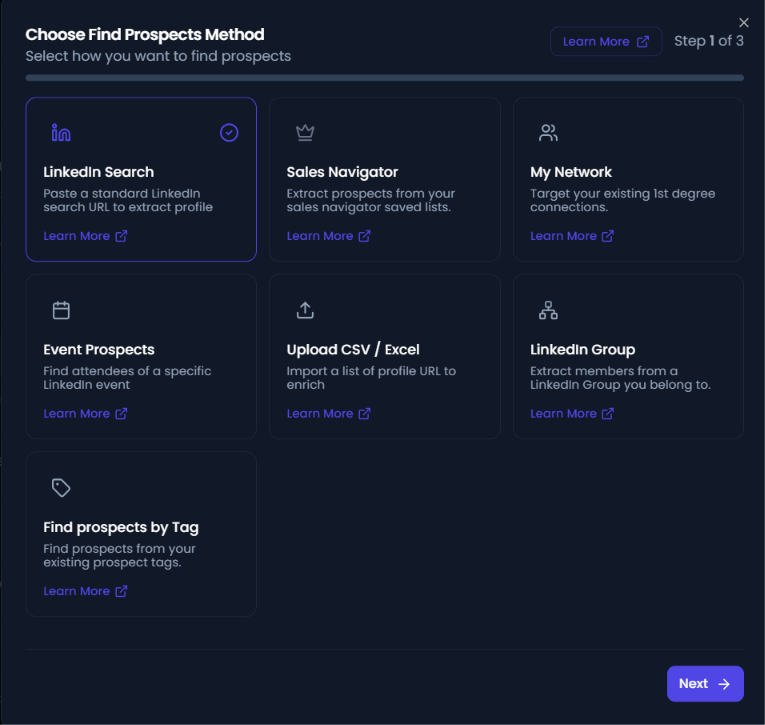
Step 3: Sequence
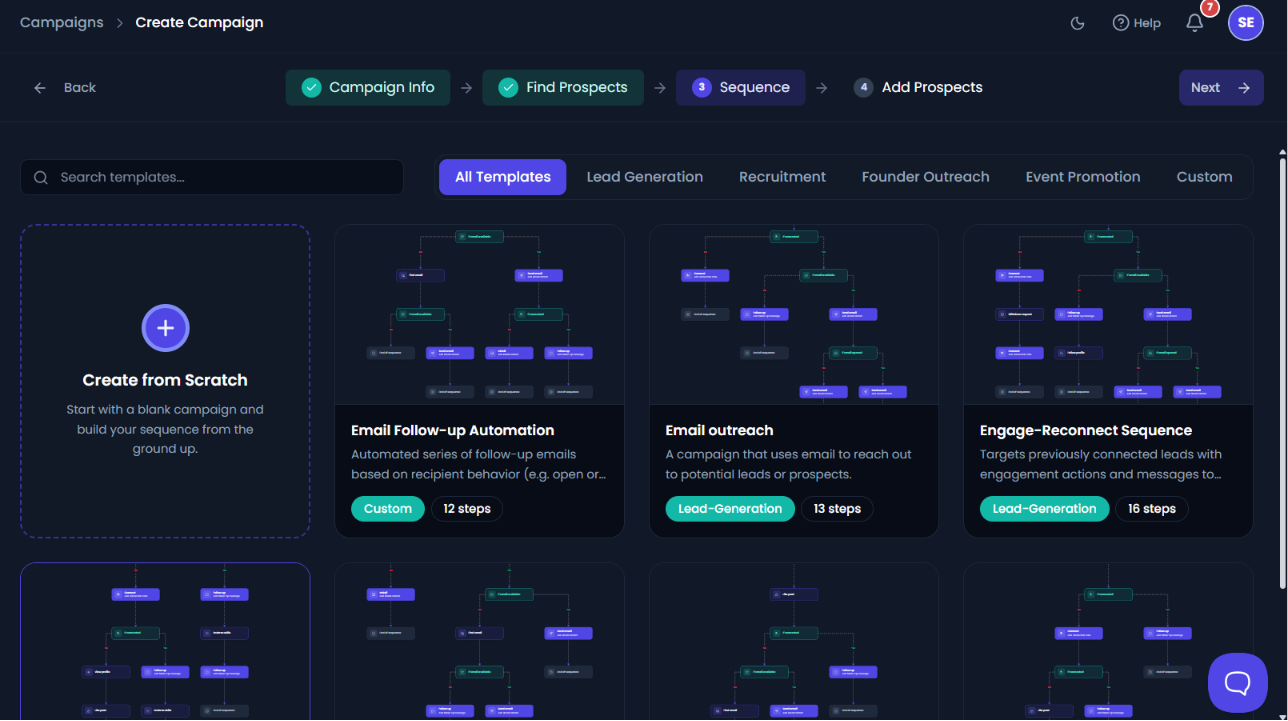
At this step, you can choose between two options to build your campaign:
- Use an Existing Template: Select a pre-built template that matches your campaign requirements and click on use this template to get started quickly. You can customize the template by adding additional actions or steps to your campaign flow.

- Create From Scratch: Build your campaign from the scratch using the Flow Builder. Add and customize different actions, conditions, messages, and delays to create a campaign flow that meets your specific requirements
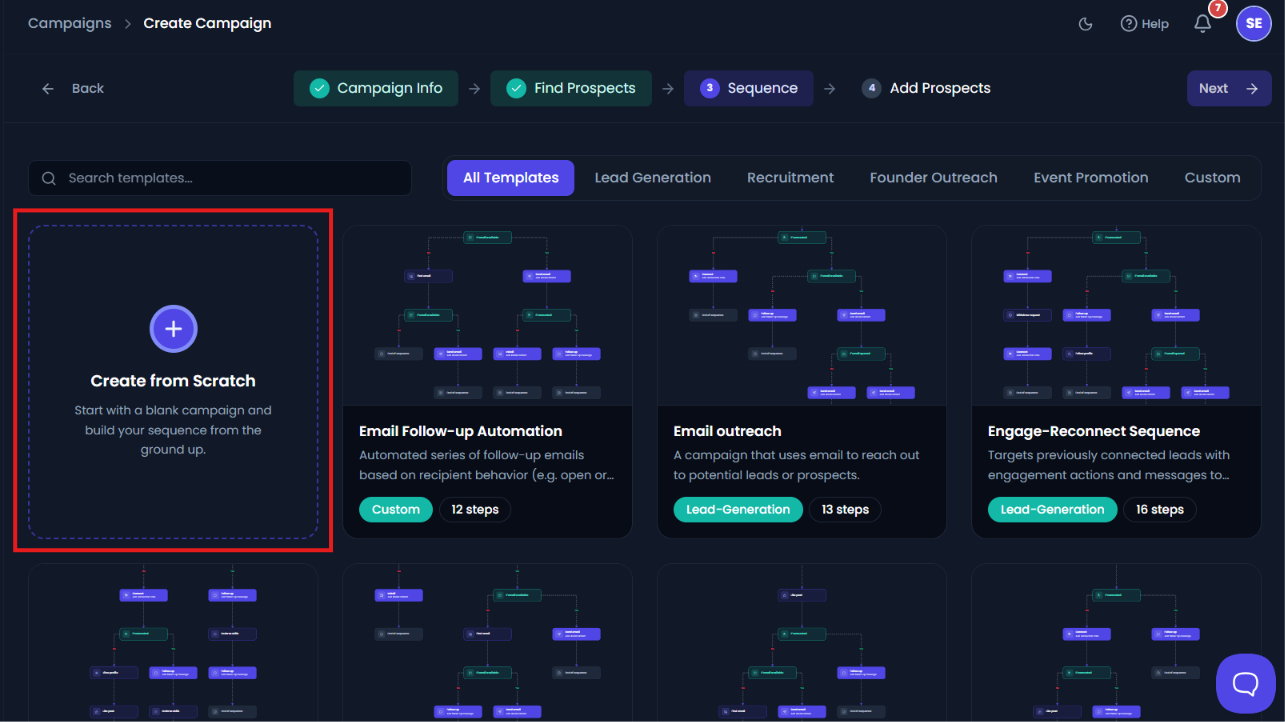
Choose the option that best suits your campaign needs and continue setting up your campaign. And click next.
Step 4: Add Prospects
The Add Prospects option allows you to add prospects from your prospect list to your campaign. You can either select all prospects or choose specific prospects individually based on your campaign requirements.

Then click on save and review campaign.

Step 5: Launch Campaign
When everything is set. Click on launch campaign to launch campaign.

You will able to see stats for each action nodes once the campaign starts running.
